Getting creative with a brand new pair of Adidas ‘Adistar 4’ running trainers.
In this post, I share with you how I turned a brand-new pair of Adidas Adistar 4s into a clean, commercial-style product shoot.
There’s something about a fresh pair of running shoes. Before the first mile. Before the first puddle. Before you convince yourself you’re “basically Mo Farah” because you did a 10K without stopping.
I picked up the Adidas Adistar 4 for my own long-distance training. But before they hit the pavement, I knew they had to hit the studio. They were too clean. Too sculpted. Too… photogenic. This wasn’t a client job.
This was a creative exercise. No sponsorship, no affiliate product placement. Just an opportunity to reverse-engineer a premium sportswear aesthetic and prove that with the right lighting and control, you can create something that feels commercial, quickly and simply.
The Concept – Inspired, not Imitated.
I’d been looking at product imagery on the official Adidas website. Clean gradients. Controlled highlights. Confident shadows. A subtle “infinite” background that makes the product feel like it exists in its own world.
The aim wasn’t to copy shot-for-shot, but to understand the structure of the lighting and recreate the feel in my own way.
I wanted:
- A soft gradient background.
- Controlled top highlights.
- Gentle shadow falloff underneath.
- Crisp detail across the fabric and sole.
- A commercial finish without overcomplicating the setup.
And most importantly, I wanted it to be achievable in a small studio space without a huge lighting team.
The Equipment: Simple, Solid, Reliable.
This shoot was done with gear I know and trust:
Camera: Canon 5D Mark III
Lens: Canon 135mm f/2L
Settings: f/11 | ISO 400 | 1/50s
Tripod: Velbon D-700
Tripod Head: Velbon Vel-Flo 9 PH-368
The camera was positioned approximately 2 metres from the trainer, locked firmly on the tripod.
Why the 135mm? Compression.
The longer focal length flattens perspective slightly and gives a more premium product feel. It avoids distortion you might get with wider lenses, especially on a product with strong horizontal lines like a running shoe.
Shooting at f/11 ensured I had full sharpness from toe to heel. Product photography is unforgiving, if the back edge falls soft, it looks accidental rather than artistic.
ISO 400 gave me flexibility with flash power without pushing too hard. And at 1/50s, I’m comfortably within sync speed territory while letting flash do the heavy lifting. Everything was locked down. No movement. No guesswork. Just control.
The Background – Creating the Infinite Look.
The backdrop was a Bessel Chromakey 6m x 2m Green/White PVC background.
The size matters here.
That 6m length allowed enough distance between the product and the curve to create a smooth gradient transition between “floor” and “wall.” It gives that infinite sweep effect with no visible horizon line, just seamless space.
Even though it’s technically chromakey material, the white side worked perfectly for this style. PVC also reflects light differently to paper; it holds gradients beautifully when lit correctly.
Positioning was key:
- The trainer(s) sat far enough from the background to avoid harsh shadow edges.
- But not so far that the gradient became flat and lifeless.
It’s a balancing act. Move it 30cm too close and the shadow becomes dominant. Move it too far and the image loses depth.
Lighting Setup: Controlled Simplicity.
Lighting made this shot.
I used two flashes:
Key Light (Top Light)
1x Godox AD200 Pro
Mounted in a 120x30cm Godox Rectangle Softbox with grid
Positioned approximately 50cm directly above the product.
This was the defining light.
The narrow rectangular softbox helped create a clean, elongated highlight running across the upper mesh and three stripes. The grid prevented spill from flooding the background.
That control is everything.
Without the grid, the background would brighten too much and kill the gradient. With it, I kept the focus on sculpting the shoe itself.
This light created:
- Controlled top highlight
- Subtle falloff down the sides
- Texture definition in the knit material
Fill / Shape Light (Camera Left)
1x Godox AD200 Pro
Mounted in a Walimex 150cm Octabox (no grid)
Positioned camera left at roughly 45 degrees
Approximately 1.5m from the product.
This was the soft sculpting light.
The large 150cm Octabox gave broad, flattering light that gently filled the shadow side of the shoe. No harsh transitions. Just smooth modelling.
Because it was further away and much larger, it wrapped beautifully around the midsole, particularly highlighting the mint gradient foam. Together, the two lights created depth without drama. Clean, modern, commercial.
Let’s Have A Look At How Some Of These Were Shot.
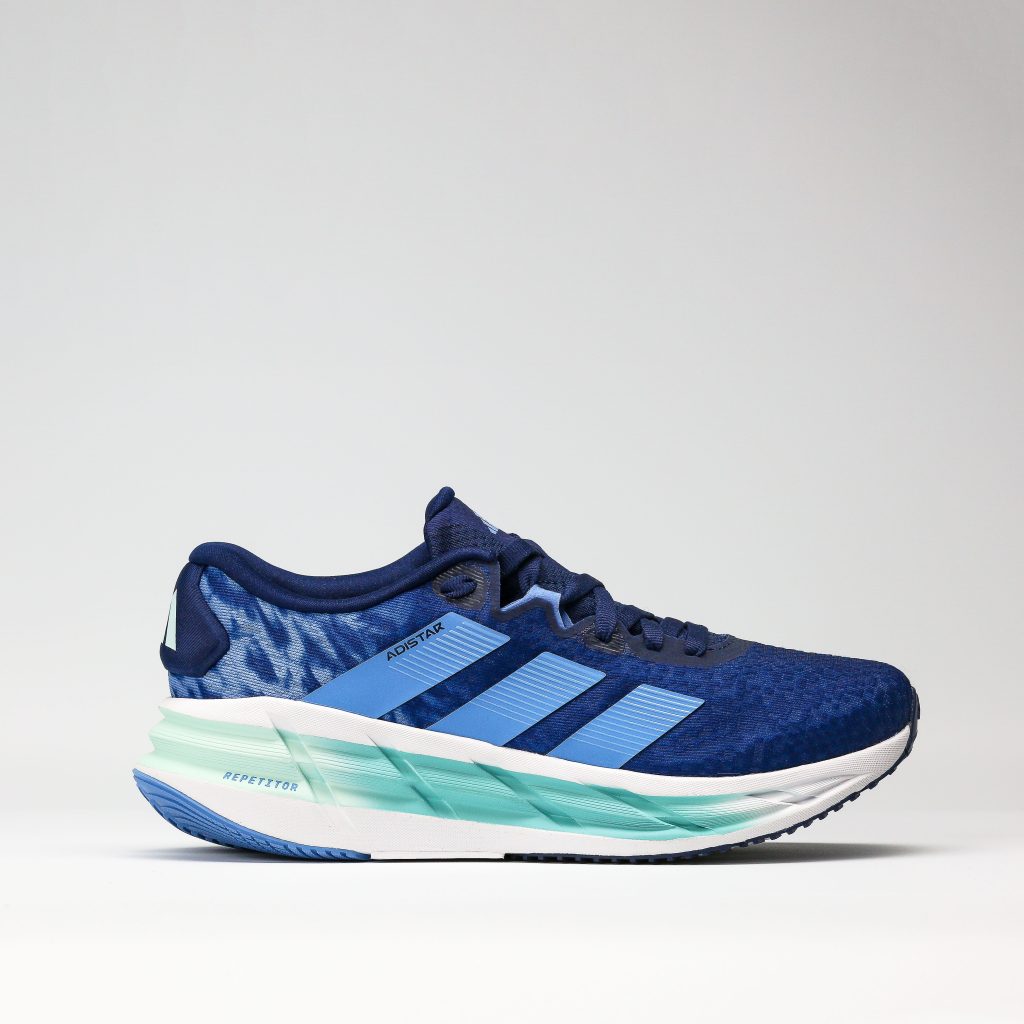
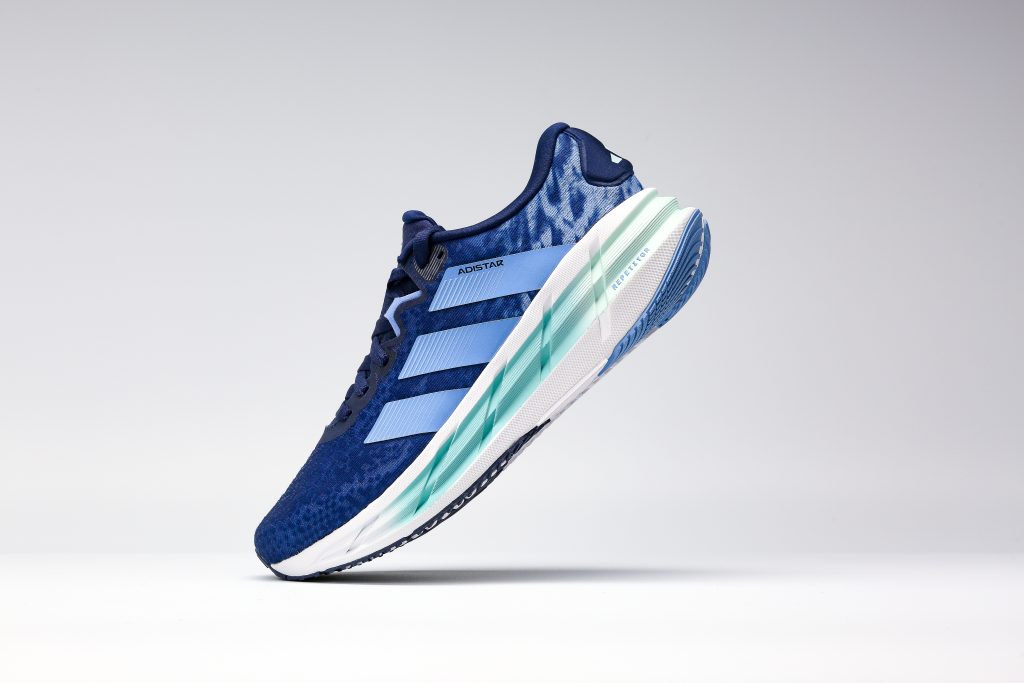
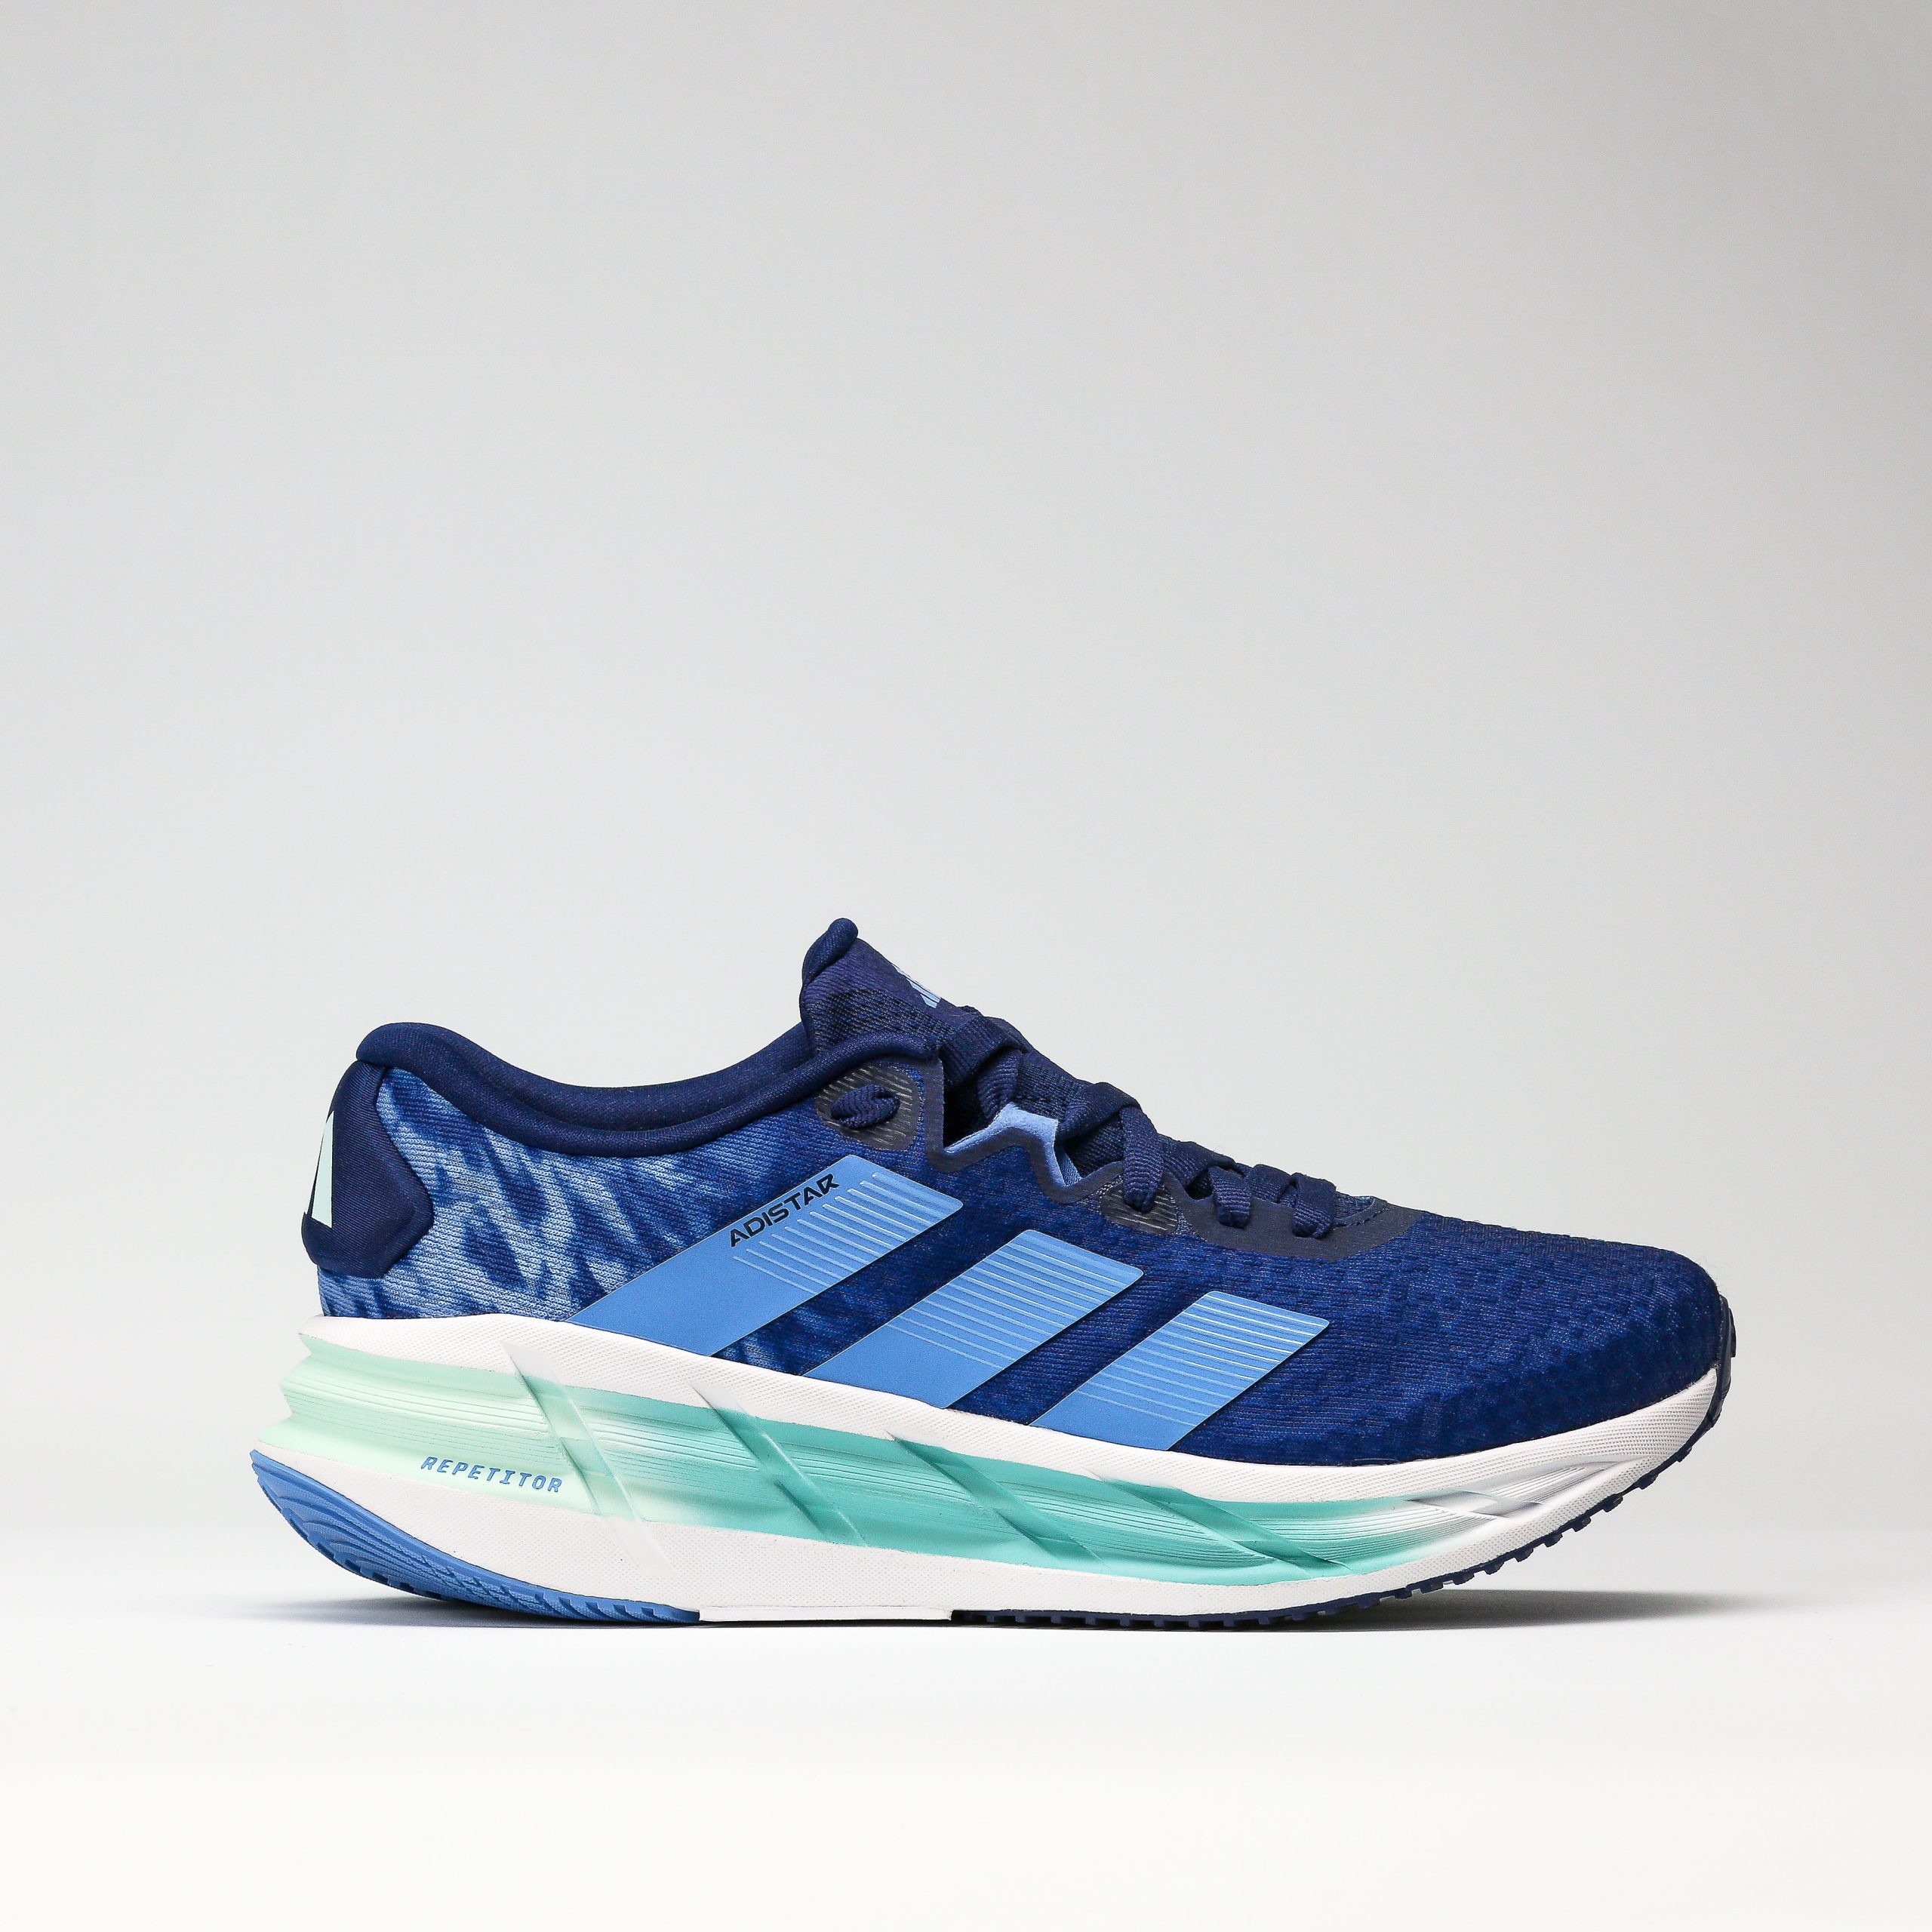
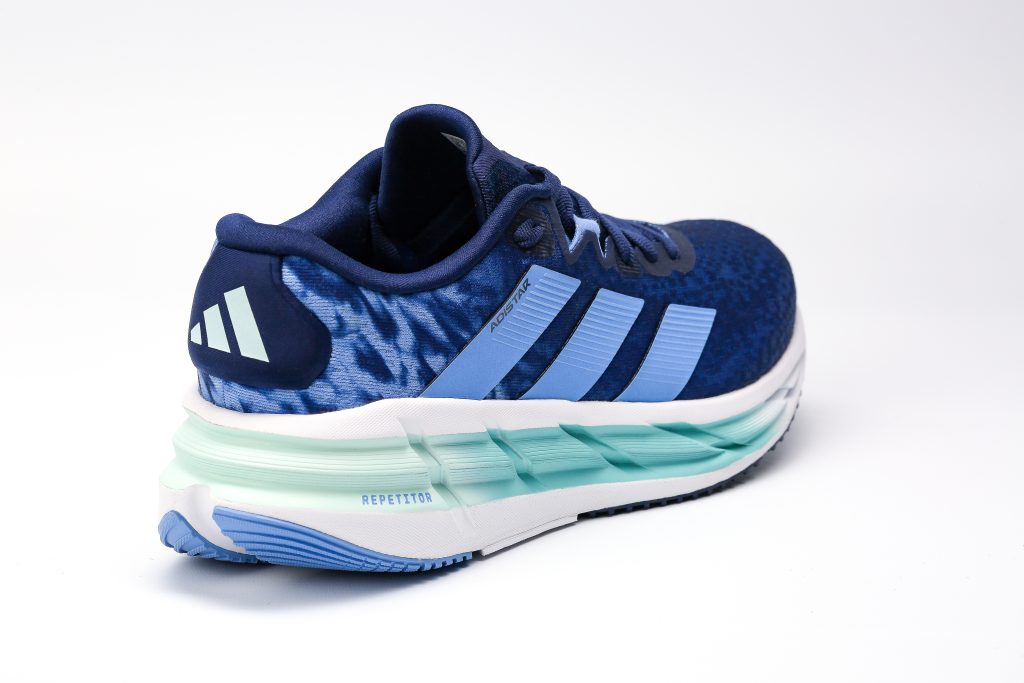
This is the hero.
A classic side profile showing the full silhouette. Clean lines. Branding visible. Midsole detail intact.
This shot is all about balance:
- The top light creates a controlled highlight across the mesh.
- The side Octabox shapes the sole.
- The background holds a soft gradient without distraction.
At f/11, everything is crisp. From the lace eyelets to the edge of the outsole. For product photography, this angle is non-negotiable. It’s your anchor image
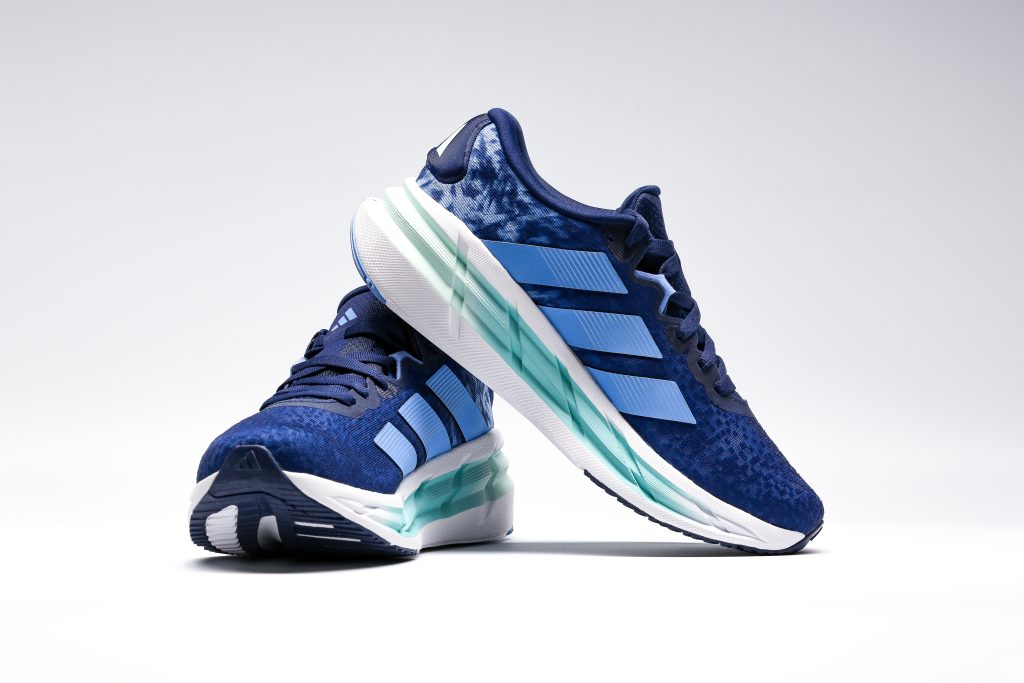
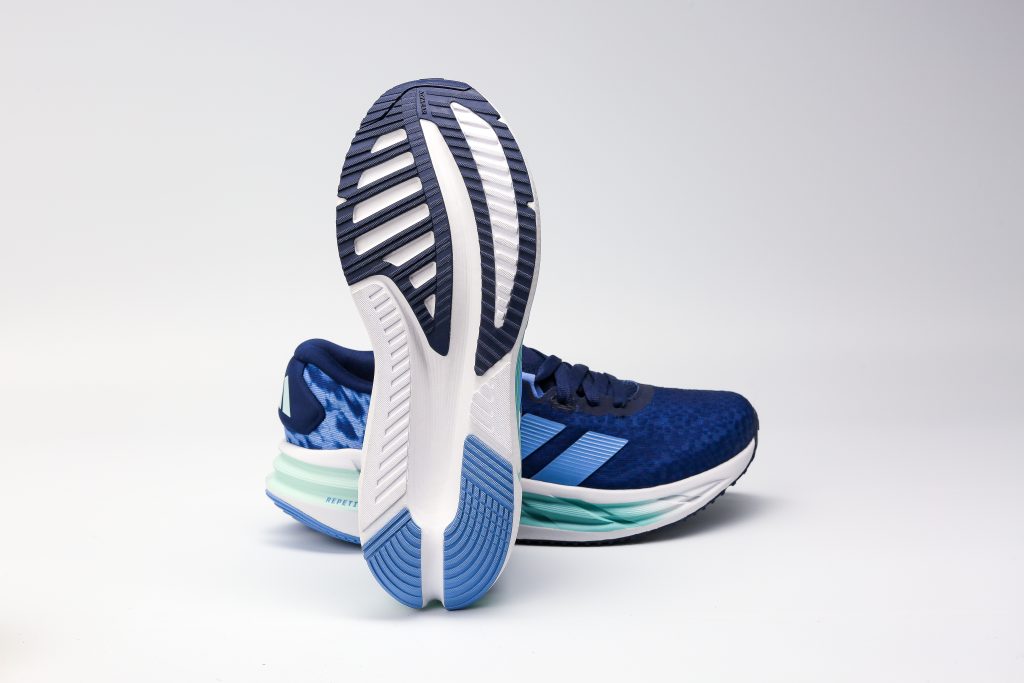
This shot was all about function.
The trainer was stood vertically, resting against the second shoe positioned behind it.
This allowed the outsole grip pattern to be front and centre without needing extra support structures visible in frame.
The lighting here was crucial:
- Too flat, and the grip texture disappears.
- Too directional, and you get harsh shadows in the tread.
The Octabox helped gently fill the grooves while the top light added separation along the edges. If you’re photographing footwear, never skip the sole. It’s half the engineering story.


Why This Shoot Matters!
This wasn’t a paid job. It wasn’t commissioned. It wasn’t even strictly necessary.
But it was valuable.
It was:
- A lighting exercise.
- A study in commercial product styling.
- A reminder that you don’t need a massive crew to create premium-looking imagery.
- A chance to practise before the product changed forever.
And honestly? It was fun. There’s something satisfying about building a controlled environment, shaping light precisely, and watching an everyday object transform into something campaign-worthy.
Final Thoughts…
Good product photography isn’t about endless gear.
It’s about:
- Understanding light direction.
- Controlling spill.
- Managing gradients.
- Locking down your camera.
- Paying attention to micro-adjustments.
Two lights. One backdrop. A solid lens. A tripod.
That’s it.
Before these Adistar 4s started clocking up miles, they had their studio moment. Clean. Sculpted. Sharp.
Now they’re out earning their keep on the road. And I’ve got the shots to prove they once looked this good.
You might also like


Leave a reply